Using the editing suite
In order to get the real value out of the product, you need to create a customised convention for your marketing needs. There are two ways of doing this. The easiest way is to use the questionnaire, which you can find here. The less easy, but more in-depth, way is to use the editing suite yourself. The editing suite can be found here, and can also be accessed directly from your account dashboard.
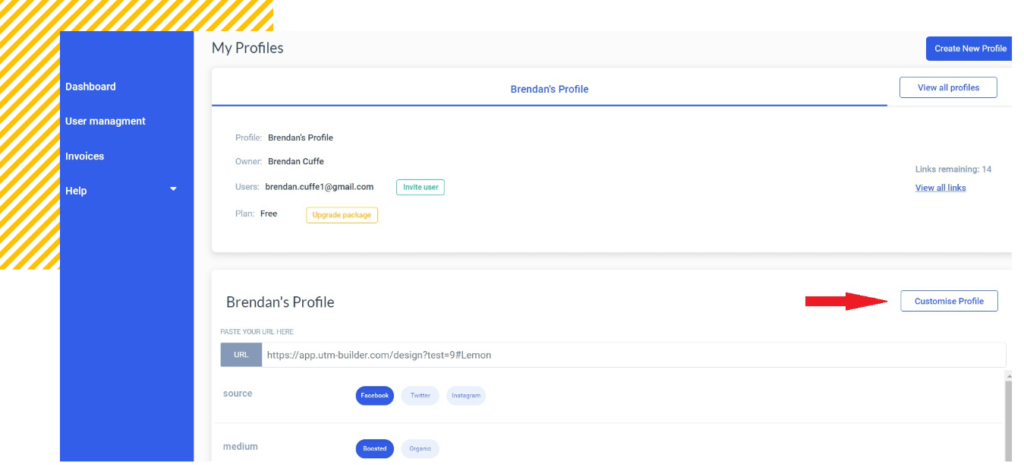
The editing suite looks like this:
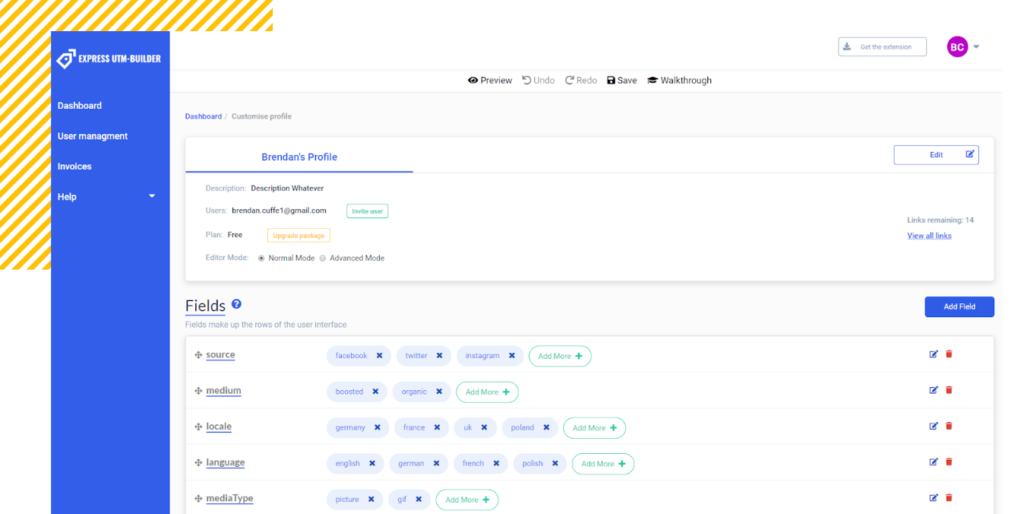
You can use the editing suite to either build a convention from scratch, or to alter an existing one. You can only access the editing suite for a profile if you have editing permission. If you are on a team where someone else designs/maintains the convention, it’s possible that you are able to use the Chrome extension to create tagged links, but not able to access the editing suite. There are a range of features which are available in the editing suite. At the top of the editing suite is some overall information about your convention: The convention name, a brief description, a list of users, the price plan your convention is at, and the distinction between normal and advanced modes. Normal mode is sufficient for many users, but if you are trying to unite a large organisation with one consistent UTM convention, it is likely that you will need advanced mode.
Watch this video to see how to customise your Profile & Chrome Extension
Fields
The first section of the editing suite which you will see is titled ‘fields’. A field is essentially a row of buttons in the button matrix. By clicking and dragging in the editing suite, the order of the fields can be changed. This will not change anything about how the data in the outputted link is written, but will change the appearance of the button matrix in the Chrome extension. The ordering of buttons within a field can also be changed. Additional buttons can be added to fields. Usually, fields contain buttons, where the selected button sets the value of the field. However, fields can also take free-text entry, or a combination of free text and buttons.
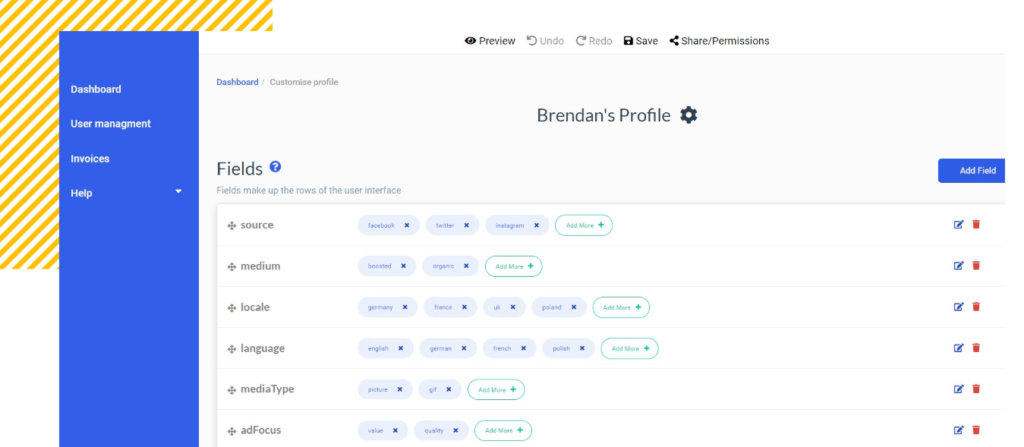
The Chrome Extension of this convention will have a button matrix consisting of six rows.
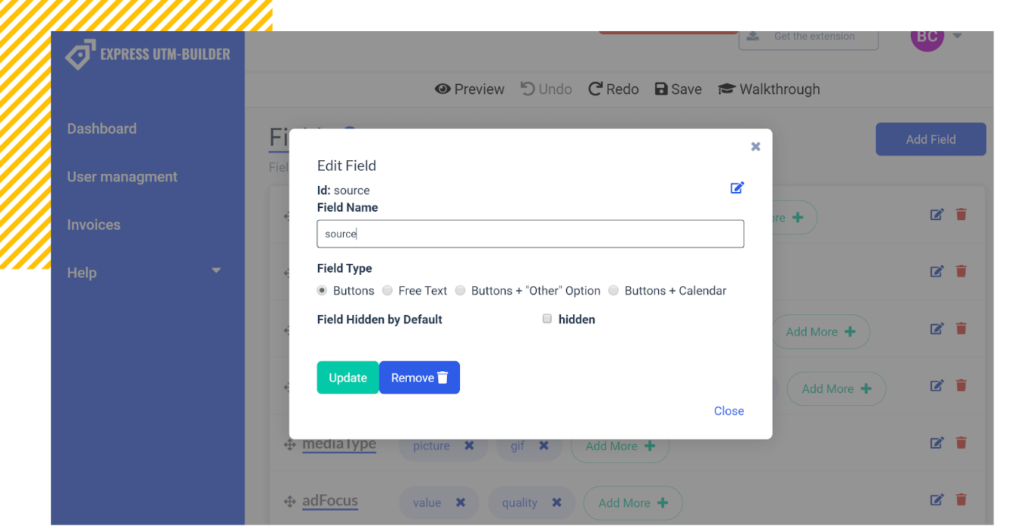
The button at the top right of the screen can be used to add more fields. The red ‘bin’ icon can be used to delete fields from the button matrix. The blue edit icon can be used to alter important details about a field. The name and id of a field can be changed. (By default, the name and ID of a field are the same, but they can be made different if needed. A field’s ID must be unique, whereas a field’s name can be duplicated.) Additionally, this dialogue allows you to change the field from buttons, to free-text entry, to a combination of the two.
Datapoints
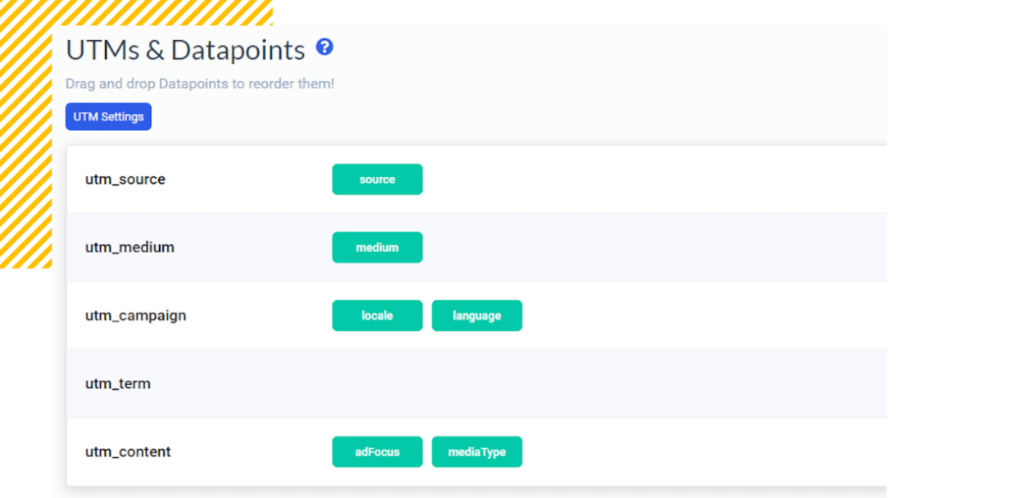
Located below the fields is the panel which allows you to specify the relationship between datapoints, fields, and the UTM arguments. (A more detailed explanation of datapoints on a conceptual level can be found in the ‘UTMs and Datapoints’ article). This panel allows you to choose which datapoints are written to which UTM arguments, and the order in which they appear. By default, each field maps to exactly one datapoint, which shares the field’s name takes the value of whatever button is selected in the field (or whatever has been typed into the text entry). By selecting ‘advanced’ mode, you can change this default.
Additional buttons and features in the editing suite include:
- Save Changes: This is needed to ensure that edits made to a profile propagate to users with read-only access.
- Preview: This allows you to see a representation of the button matrix which will appear in the Chrome extension, reflecting any edits you have made while in the editing suite. This is useful to check up regularly as you make changes to a profile in the editing suite.
- Undo: Undo the most recent edit made to the profile.
- Redo: Repeat the last action taken (if possible)
- Walkthrough: This revisits the simple tutorial that shows where important features of the editor are located
